Category Archives: Uncategorized

Easy & inexpensive Christmas tablescape ideas

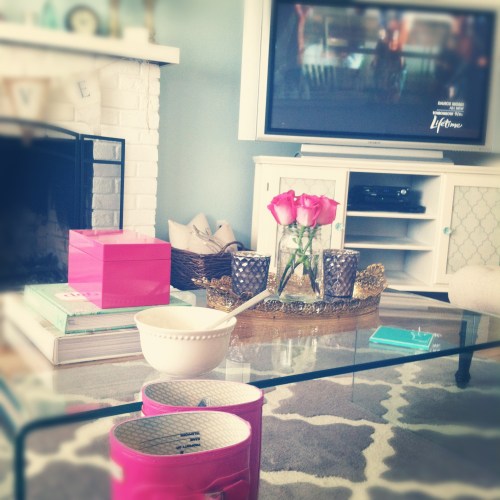
The Holidays are upon us already! How did that happen so fast? I love this time of year… all the yummy desserts, family traditions & warm cozy nights snuggled up by the fire. This year we’re having Christmas morning at my house where we’ll have everyone over to eat a huge breakfast & open gifts. Later will be dinner at my mom’s with Clayton’s family & mine. She’s making her famous garlic mash, honey ham & other goodies. I cannot wait!! I’m looking forward to being preggers this holiday season.

Now onto to the decor:

{All images via Pinterest}

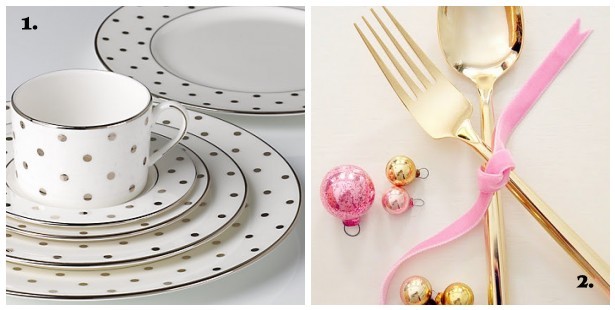
1. I recently saw these Kate Spade inspired dishes on Pinterest and thought they would be fantastic for the holidays. You could easily create this DIY on some plain white dishes you have laying around or go grab some at your local Goodwill or thrift store! Pair them with another patterned plate & you have a layered look with lots of personality.

2. I love anything gold. Tie silverware with ribbon, lace or twine to give your place settings a pulled together look.

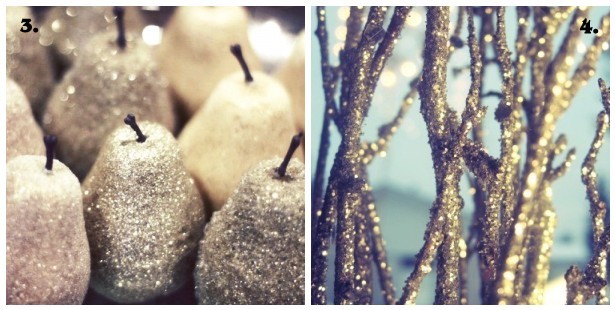
3. Use Dollar Store fake fruit and spray paint them with metallic and glitter. Place one on at each place setting for some added glam. If you are planning on having assigned seating, you could attach a name tag to each pear.

4. To keep the sparkle theme going, use more glitter spray paint on branches from your backyard! Add them to a vase or lay them in the middle of the table mixed with a ton of candles and you’ve got a gorgeous centerpiece that cost almost nothing!

5. There are so many creative things you can do with candles. If you have mason jars, you can fill them with sand, cranberries, rice or whatever you like. While you’re at the Dollar Store grab a bunch of pillar candles to add to hurricane vases for a romantic lighting all throughout your house. Tie cinnamon sticks around candles with twine. So cute & it makes your house smell amazing! Mercury glass is timeless and goes great with any holiday decor.

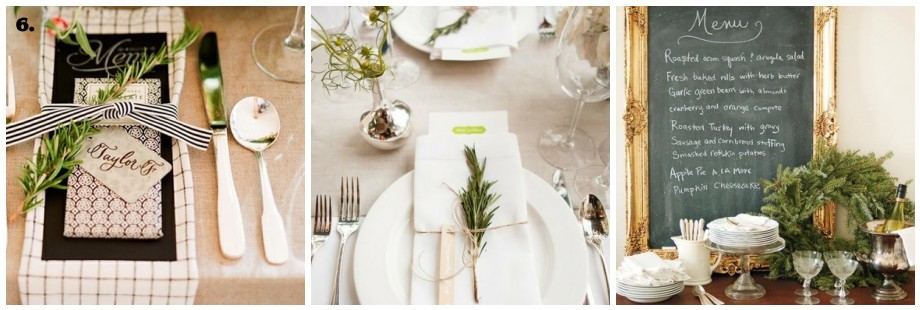
6. Personalize a menu for each place setting or use a pretty chalkboard and display the menu there. Either way menus are a nice touch.

I found this DIY menu using muslin bags and a custom stamp! How cute is this??

{Via Scout Blog}

Which is your favorite? What sort of things to you like to do to save money on holiday decor?

Follow my DIY board on Pinterest for more ideas

Xo,

Melissa & Virginia

4 Comments

Filed under DIY Ideas, Home decor ideas, Uncategorized

Modern nursery rugs

In my long search for the perfect nursery rug, I found so many cute ones that I loved!

Thought I’d share some with you, in case you are having as much trouble as I did finding that perf rug for your nursery.

I was basically obsessed with the Madeline Weinrib Brooke Rug in hot pink, but then found out it was $1100 for 5×8, so that was definitely out of the question. So sad! If it’s in your budget though, go for it. It’s stunning, and if you hire the carpet cleaning las vegas company you will never have problems with odors or anything!! They have a lot of different colors too.

{Via Apartment Therapy}

This gold zebra rug from Overstock is gorg!! I know it’s not the typical nursery looking rug, but that’s what I like about it. It’s so different & glamorous. At $486 it’s not bad, but still more than I really wanted to spend.
{Via Pinterest}

The West Elm Souk rug was also one of my favorites

{Via West Elm}

The Surya Archive Rug in coral is gorgeous too

{Via Rugs USA}

I thought it would compete too much with the black & white striped wall though

This hand tufted wool black & white chevron is gorgeous too

{Via Rugs USA}

Another chevron from Land of Nod

{Via Land Of Nod}

I also found that Urban Outfitters has a ton of cute rugs that would be perfect for boys too. They are really affordable.

Also loved this black & white geometric rug I found on Ebay

We ultimately decided on the Pottery Barn Kids chevron rug in pink, which I am really happy with. I like the fact that it’s cotton & at $250, pretty inexpensive. So if it gets ruined by baby girl, it won’t be too much of a disappointment!

{Via Pottery Barn Kids}

Originally I thought I would have to return it thinking there would so too much going on in with the black & white striped wall and everything, but it looks amazing! Very girly, yet sophisticated & modern just how mommy wanted it 🙂 Which is your favorite?

We hope you have a Happy Thanksgiving!

3 Comments

Filed under Home decor ideas, Uncategorized

Home decor trends winter 2012

This is a guest post provided by Eva Stephen.

Autumn is upon us once again and as the (occasionally sunny) summer gives way to the slumber of winter we prepare to bed down and snuggle up. Our clothes get thicker, we add tights and boots to our wardrobes and the trusty vitamin C sneaks into our medicine cabinet. Shorter days mean longer nights in at home as do chilly weekends, making autumn the perfect time to update our interiors and make our homes somewhere we’re happy to hibernate.

Whether you fancy a full house facelift or just want to add a few affordable updates there are a range of designs, colours and textures to choose from this season. You can join the Industrial revolution, take a trip down memory lane, get creative and crafty or perhaps go on a Fox hunt.

Key Trends 1: Industrial

The key to the Industrial look is strong angular shapes, robust wood and metallic materials and practical usability. Think vintage cinemas and disused factories, metal lockers and steel chairs. You can recreate the look with new or second hand furniture, vintage lighting and metallic accessories such as hanging lamps, book end clamps and metal letters. You can also get creative by using old signage as objects d’art. The grubbier and more beaten up the better with this look but to avoid over styling try mixing some vintage industrial pieces with either contemporary Kingstown furniture from Shop4Furniture or softer decor. Although this look works fantastically well in airy loft style apartments it will sit equally as comfortably in a 1930s semi or Victorian terrace. You can pay homage to your home by finding second hand or reproduction pieces that reflect the period it was built. If you have a new build these old pieces can be a fantastic contrast to those newly plastered walls by adding interest and depth.

  Industrial bedroom design Via Busy Door}

Key Trend 2: Retro

The swinging 60s and sexy 70’s will never be too far away when it comes to design. The space age styling of the 60’s made way for the shag piles of the 70’s and bold and bright colours spanned both decades. Today we can create a retro look by subtly merging the two. It’s not about having film set like period perfection but about capturing the essence of the era. Modern technologies in print and design mean that we can now find beautiful paisley or flock wall papers in luxurious colours and textures.

{1970’ Bedroom décor Via Caroline’s Lost and Found}

{Retro Wallpaper Via Starnet}

You can achieve the retro look by papering at least one wall in a bright and bold design. As far as furniture goes a sideboard is a sure thing and textures such as cork, hessian and of course shag pile are good additions. If you want to be a little less dramatic you can buy some charity shop crockery or modern reproductions. Coloured glass and psychedelic cushion covers can also add to the look. Allow yourself to get nostalgic with this one and choose items that you really love and that bring back great memories if you were there.

 {Nostalgic Bedroom Design Via Pinterest}

Key Trend 3: Crafty

Cost conscious times call for budget friendly design which is why the make do and mend mentality is back in Britain. Along with the post-recession mood the Olympics and the Queen’s Jubilee have added to the patriotic mood of the country and it is certainly very British to ‘make do’. From the up cycling of old furniture by repainting or reupholstering to the more crafty skills of cushion making, cross stitch and crocheting everyone can do something creative. You can even get the kids involved with some crafty projects. If you really can’t or don’t want to make something yourself you can always cheat and buy items that just looks like you made them. The wonderful thing about this trend is that you can create individual and one off pieces or dig out something old which tells a story and breathe new life into it.

{Crafty Bedroom design Via Pinterest}

  {Crafty Bedroom Décor by My Crafty Home Life}

Key Trend 4: Foxes

Last year was all about the Owl but it’s time for old Owly to fly away because 2012 is the year of the Fox. Foxes have been creeping quietly into our homes for a while and have really made a bold appearance this year. You can go fox crazy by having a fox print on your wallpaper or bedding or you can keep it low key with a little fox ornament or print on a plate. Don’t be surprised to see lamps, cushion covers and statues bearing the furry fox this Autumn/Winter.

{Fox Clock Via Babble}

 {Fox Cushins Via Kidsomania}

With all of these trends you can go full on with curtains, furniture and flooring or pair it down with accessories and ornaments.  Whichever trend takes your fancy and whatever your budget, just remember that you have to live in your home and your interpretation of a trend is what’s important. You don’t have to be Lawrence Llewellyn Bowen to create a beautiful interior. You can take inspiration from magazines and blogs and by pinching a few ideas here and there you’ll be able to create something special for your own home which is bang on trend.

Thanks to Melissa & Virginia for allowing me to guest post. I look forward to hopefully sharing more of my ideas with you all!

Best Wishes,

Eva Stephen

Leave a comment

Filed under Home decor ideas, Uncategorized

DIY Tassel Garland

While browsing online for baby shower/nursery decor I was seeing these cute tassel garlands everywhere. It was definitely on my to-do list to purchase one.

Via Confetti System

Then I found this super easy tassel garland tutorial on Pinterest by Linen & Lace & thought I’d give it a try. I literally spent $5 on materials! Much better than the $30-$40 + shipping off Etsy.

So while the hubs went out with friends on Saturday night, I dove into crafting mode

I chose four different colors of tissue paper – gold, hot pink, light pink & shimmery white

Because I decided to hang this on baby girl’s crib, you are getting a little sneak peak of her nursery!

I love how the garland brings texture & fun girly glamour to her crib & nursery
.. I think she will love it. Obviously I won’t be able to leave it there when she gets older but for now it works.

What do you think? I’m basically addicted. I’ll probably make one for xmas & other holidays too. These are great for any kind of party too! Baby & bridal showers, birthdays, holiday parties or just cute decor in your home.

BTW, yes I’ll be doing a post on the DIY black & white painted stripe wall in the nursery. I’ve got all the tips on how to make perfect stripes with no bleed through!

Here’s my latest pregger shot at 23 weeks

PS. if you’re preggers, check out the new maternity tanks at Target by Liz Lange. They are heaven!!

XO, Melissa

8 Comments

Filed under DIY Ideas, Nursery, Pregnancy, Uncategorized

Overlays + Ikea Furniture

While we were at Ikea picking up our dining room shelves, we also decided to buy their white 6 drawer Malm dresser for my office. Normally I hate Ikea furniture, but look how pretty the dresser looks with O’verlays! I plan to pretty it up with one of these fretwork designs.

{Top 3 favs}

I’m a little obsessed with the greek keys…

So pretty!!!

{Above images via Amanda Carol}

Or there’s this gorgeous classic design

{Via My O’verlays}

I could even add pulls to dress it up more

{Via Danika & Cheryle Blogspot}

{Via Pinterest}

There are so many choices, but I think my fav is the greek key design. Out of the 3 options which is your favorite?

3 Comments

Filed under DIY Ideas, Home decor ideas, Uncategorized

Ikea Shelving Completes the Look!

Friday we made the trip to Ikea to pick up their Lack shelves. $16.99 each?! You really can’t beat that.. and honestly I think they look pretty dang cute in the dining room.

What do you think? I decided on the high gloss white lack shelf instead of the matte finish. In person the matte finish looked super cheap & ugly. I was a little worried about the super modern high gloss shelves looking weird with the shabby vintage decor of the buffet, but I think it works well. Again I ador mixing modern with vintage antique pieces.

I’m loving the look of the open storage & the gold chalkboard accents the wall perfectly.

If you’re looking for storage solutions, I definitely recommend these. They come in a ton of different colors and three different sizes.

Enjoy your week!  Xo, Melissa

7 Comments

Filed under DIY Ideas, Home decor ideas, Uncategorized

Craigslist Buffet Transformation

I’m back!! Sorry for my absence. I’ve had a lot going on recently (business-wise)  and was feeling a little un-inspired in the home decor department.

I’m feeling rejuvenated and ready to share some fun upcoming projects with you! Which brings me to my latest project..

After about a year of searching Craigslist for an antique buffet/sideboard (apparently I am kind of picky) I finally found the perfect piece!

Here’s what it looked like before:

 It has all the intricate details I was after – stunning turned legs, scalloped wood & tons of gorgeous wood detailing.

After a good sanding, 3 coats of paint, stenciling and new hardware.. here is what the buffet looks like after:

Cute right?

{Supplies used}

* 1 gallon Behr paint in pure white satin finish – Home Depot

* 1 gallon Martha Stewart Dolphin Gray in satin finish – Home Depot

* Electric sander –  $30 at Home Depot

* Martha Stewart stencil pack with quatrefoil stencil – Found at Michaels  here

* Martha Stewart sponge paint roller & tray – Found at Michaels here

* New hardware from Anthropology

Now to get started:

Step 1 – Remove hardware & doors. Sand down the wood to remove shine & any scratch marks – I used 80 grit sand paper for this. I had to sand the legs by hand (UGH).

PS. Yes I know my garage looks like a junk yard. We need to have a  garage sale, don’t judge!

Step 2 – Vacuum sanding dust then wipe down entire piece with damp cloth.

Step 3 – Paint time! In both paints I bought the primer & paint all in one, since I really hate priming. Using the all in one paint worked great.

I did 3 coats of white – in some spots I had to do 4 coats

I painted the cabinet doors with 2 coats Dolphin Gray

Step 4 – Stenciling. I decided to use the quaterfoil stencil from the Martha Stewart stencil pack. I was a little tricky at first to get the hang of it. The second drawer was definitely better than my first, but I don’t really mind.

Tape down your stencil, making sure it’s straight.

Only use a small amount of paint on your sponge roller, and gently roll over the stencil. If you use too much paint on your roller, it will seep under the stencil and then design doesn’t come out so pretty.

Not bad right?

Step 5 – Install pretty new hardware & you’re done!

We finally have extra storage!

This weekend Clay & I are going to Ikea to get these floating shelves to go above the buffet. I still need a spot to store all my wine glasses & pitchers, so I think the shelves will work perf. Can’t wait to see what it looks like.

Stay tuned for the big reveal!

By the way, do you think I should paint our dining table?? It seems so dark now..

Oh and we are also going to finally hang this lovely gold chalkboard above the buffet too.

Enjoy your weekend! Xo, Melissa

9 Comments

Filed under DIY Ideas, Home decor ideas, Uncategorized

Weekend veg-out has officially begun.. Complete with a Lifetime movie

Weekend vegg-out has officially begun.. Complete with a Lifetime movie

Happy Friday!!!

I’ll be back Monday to share all the fun deets of Clay & I’s 10 year anniversary trip!

Xo, Melissa

Leave a comment

April 6, 2012 · 6:19 pm

Going “green” in the kitchen {by Erik Braunitzer & Elliman Real Estate of NYC}

This is Erik Braunitzer, from Elliman Real Estate in New York City. I am very excited for the opportunity to guest post for Melissa & Virginia here at House To Home Blog.

Tips for a greener kitchen

By Erik Braunitzer, and compliments of Douglas Elliman Real Estate Company, agents for NYC Rentals.

There’s a lot of emphasis these days on going green, but one of the places it’s heard most is in the housing industry. The way we use resources in our homes as we go about our daily lives has a tremendous impact on our carbon footprint, and this is especially true in one of the most energy-heavy rooms of the house: the kitchen.

Appliances: A home’s kitchen is its heart. All too often, it’s the heart of our electrical bill, too. Kitchens are full of large, energy-sucking appliances. One of the most direct ways to reduce home energy use is by ensuring that all major appliances such as stove, fridge, microwave, and dishwasher are energy-star compliant at the very least. Exceeding those standards would be even better. For dishwashers and faucets, purchasing models that use less water or utilize low-flow technology is another key element. Look for appliances with the energy star sticker. Not only is this better for the environment, but you will save loads of money on your bill.

{via Comparance}

Lighting: A combination of natural lighting during the day and efficient lighting in the evenings add up to green savings. Compact fluorescent bulbs can be used in existing standard-sized sockets, and last up to ten times longer than standard incandescent bulbs. Alternatively, LEDs are even more efficient, lasting up to ten times longer than CFLs. During the day, try to not flip a switch on at all, and instead use the light from windows. If existing windows are old or drafty, consider replacing them with an energy-efficient alternative. Most of a home’s heat loss occurs through its windows, so it’s important to find a balance that allows plenty of natural light without sacrificing excess energy loss.

Counters: Counter tops are the real workhorse of a kitchen, but green can still be tough. Kitchen counters can be made of recycled glass, sustainable hardwoods, renewable bamboo, or natural stone. Any of these options provides a beautiful, chemical-free alternative to the typical plastics-based counter top that may be off-gassing toxins into your home for years to come.

Reclaimed wood counter tops – beautiful & recycled{Photo via Fresh Interiors}

{via CoolCounters}

Flooring: Replacing worn vinyl with new vinyl doesn’t solve any environmental problems. Vinyl is a petroleum-based product that cannot be recycled, does not degrade, and has a limited lifespan. The production process required to create vinyl includes toxic waste as one of its main byproducts. Natural linoleum or cork flooring is comparable in price to high-end vinyl, have natural antimicrobial properties, and are both very durable. Both are renewable, and biodegradable, making them ideal for the homeowner who wants to go green. Natural tile and bamboo are other good alternatives.

Chevron reclaimed wood floors {Via Pinterest}

{Via Pinterest}

Cabinets: Remember, being green isn’t just about using non-toxic, renewable, or energy-efficient products. It’s also about keeping waste out of landfills and making the most out of your existing resources. If current kitchen cabinetry is dated but still functional and sound, a quick coat of glossy zero-VOC paint can bring them up to date. If the alternative is to rip out the kitchen and dump the cabinets in a landfill while replacing them will all-new cabinets made from recycled or sustainable materials, which option is really better for the environment? High-quality non-toxic paint is a whole lot easier on the budget, too.

Reclaimed wood cabinetry goes with any style. Whether you like rustic, modern, contemporary or a mix of a few.. you can achieve that look with reclaimed wood

{Images via Pinterest}

Remember, going green isn’t just about physical surroundings. It’s about the decisions we make every day. This includes making smart choices about water usage by taking short showers and only running full wash loads, recycling, composting, and carpooling. A few small changes tossed in with all that remodeling will make it easy to be green.

Erik is a member of the creative writing & web strategy department at PDE. Along with an experienced team of writers, he blogs mostly about interior design and issues of sustainability. For more information, feel free to contact Erik directly.

Leave a comment

Filed under Home decor ideas, Increasing Your Home's Value, Uncategorized

Photograph Collage Wall Complete

I finally got around to making that collage wall I was telling you about awhile ago! I found the idea on Pinterest and knew I had to do it. It’s like personalized wallpaper!

The part that took me the longest was sorting through our millions of wedding & engagement photos.

I picked up the knob from Anthropologie

I wanted the entire door covered in photos, so to fill in any bare spots, I cut out some photos of our wedding cake, favors, scenery etc

Considering what the door used to look like…

this is a huge improvement!

You like? Xo, Melissa

2 Comments

Filed under DIY Ideas, Home decor ideas, Uncategorized