Tag Archives: DIY

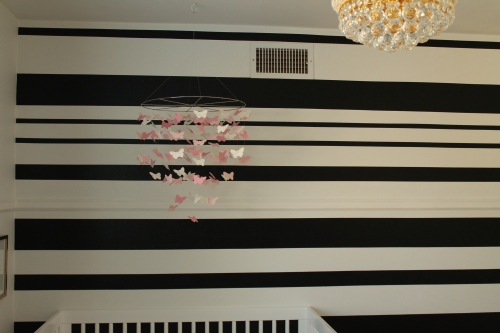
DIY black & white stripe wall

I think this is my favorite DIY project yet. It’s up there with the diy tufted headboard & antique buffet transformation .

IMG_0159

When first starting to plan the nursery, i was looking at colors and nothing was really catching my eye. I knew I wanted an all white room with an accent wall or accent ceiling & I definitely knew I wanted glamour, modern & sophisticated. I decided to browse through my Pinterest Nursery board (Gotta love Pinterest!)

and low and behold.. this photo
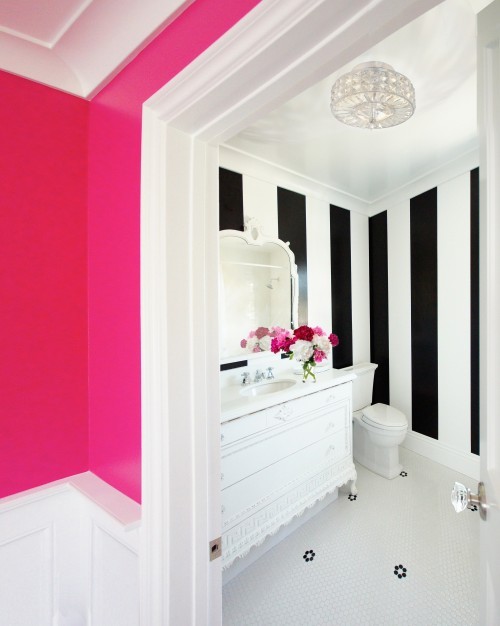
97671885639016665_beFZZQ0T_cI don’t typically like vertical stripes, so I was on the hunt for horizontal striped pattern. Also I didn’t want the standard stripe wall, with all the stripes being the same size. I googled irregular striped wall and fell in love with this look

155655730840472777_orCYiwH0_cAmazing right? Once again, Clayton thought I was absolutely out of my mind & could not wrap his head around why I would want a black and white room with no pink on the walls! Even though I profusely explained to him that there would be pink accents everywhere, he just wasn’t understanding my whole concept. Typical.

So now for the DIY portion of this post..

What you will need:

  • ruler
  • pencil
  • pure white flat paint
  • pure black flat paint
  • LOTS of frog tape
  • plastic spackle tool

First you need to paint the wall white. Decide how many stripes you want on your wall. Also how many inches each stripe will be. (I drew out a little diagram of this part, so I could conceptually understand how it would look on the wall) Measure them out with your ruler and make a few marks with your pencil. Draw a straight line across the wall, connecting the pencil marks. In order to keep the pencil line straight, we used the top cover piece of the window blinds. Very resourceful!

photo 2

Should look like this when you’re done. I put a “B” on each stripe we were planning to paint black, so we wouldn’t get confused. I highly recommend doing this, otherwise you could accidentally paint black where it’s supposed to be white.

**Side note** You are probably thinking.. why didn’t they just use a level? Well yes, you would think that would be the easiest option. However, most older houses are built where the walls are not level. So that’s why using the measuring method is best, unless you want your stripes to be slanted. For newly constructed houses, you could get away with using the level.

Now for the most tedious part of the process – tapping.

I really took my time on this, making sure the tape was straight with the pencil lines. I also made sure to tape outside of the pencil lines, so that the black paint would completely conceal and pencil. Don’t worry if it’s not perfect, you can always go back after it’s dry with white paint to cover any pencil marks.

photo 3(Sorry for the crappy iphone pics)

Once all the tapping is done, take your plastic spackle spatula & run it across the frog tape edges, ensuring no paint seepage. Then take your white paint and do a coat inside the “B” marked stripes. This will guarantee that no black will seep through & ruin your stripes.

photo 4

After about 2 hours, paint on your black stripes. I took me about 3-4 coats. After an hour & 1/2 we pealed off the frog tape, to reveal perfect stripes. I was amazed. I couldn’t believe how good it looked. You don’t want to wait more than two hours to remove the tape.

I especially love the skinny stripes on the wall.

IMG_0150

IMG_0155

IMG_0153Honestly, I’m no professional painter or DIYer by any means.. so if we can do it, you can too.

I’m so happy with how it turned out. For the next few days after it was complete, we both couldn’t stop going in the room just to stare at the wall! lol. Makes me happy! Can’t wait for our girl to arrive, so I can spend more time in here. IMG_0148Maybe the husband will start having more faith in my crazy unique ideas now. He loves the room & so do I.
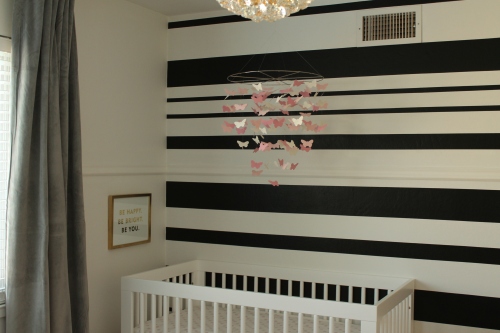
I’ll share more nursery photos once it’s complete!

IMG_0154Xo, Melissa

22 Comments

Filed under DIY Ideas, Home decor ideas, Nursery

34 weeks

To say the last few weeks have been crazy, would be a huge understatement. Between the childbirth & baby care classes,  maternity shoot, car shopping, baby shower planning & finishing up the nursery it’s been jam packed.

I can’t believe I’ll be having this babe in just 6 weeks! Here is the latest bump pic:

32 weeks + 4 days

Current cravings: peanut butter & avocados (not together lol)

Current annoyances: Not being able to get comfortable while sleeping. I get these weird buzzing/tingling feelings in my lower left back & also under my right rib. Keeps me up sometimes. Have any of you mommas experienced buzzing or tingling while preggers? So bizarre! I now have to sleep with 5 pillows just to be semi comfy!

Things I miss: Sleeping on my stomach! Pre-preggo I had a huge addiction to sleeping on my stomach.. only 6 more weeks. Can’t wait.

Things I’m loving: Her kicks. She is a super active baby. I love laying on my side and seeing her kicks and jabs through my stomach. LOVE it.

Current weight gain: 34 pounds

Last weekend we had our all day childbirth class at Santa Clara Kaiser. It was actually really informative. The instructor went over everything. We learned breathing techniques, positions to ease labor pain, terms we will need to know, watched labor movies &  played games. It was actually pretty fun! 8 hours was a little much, but overall it was definitely worth it. Clayton took a ton of notes & we asked lots of questions. Afterward we both were saying how we feel so much more comfortable with what is going to happen now.

Sunday we had our maternity shoot with our friends Jason & Anna, who also shot our wedding & engagement shoot. It was a lot of fun. To be honest I was kind of dreading getting my picture taken.. it’s little different when you’re pregnant & feel like a huge whale. But of course J & A made it super fun. We love them.

Can’t wait to share the photos with you guys.

I leave you with a little peak at baby girl’s nursery

IMG_0095I am still patiently waiting for my Nurseryworks Empire rocker… It’s backordered until March 4th! I hope it arrives before our little one does.

sneak

The side table lamp is from Target. The $7  lampshade was plain white, so I added a little grosgrain ribbon to the top & bottom. I like that it ties in with the black & white striped wall. The lamp base is acrylic, not glass. Much safer for baby.

sneak2

Just waiting for the maternity & newborn photos to complete the gallery wall above her changing table

sneak3This is the fabric I ordered for her crib skirt.. I love the anchors, but I’m still undecided. I was planning to DIY her crib skirt this weekend. What do you think about the fabric?

IMG_0090Have a fabulous weekend!!

Xo, Melissa

12 Comments

Filed under DIY Ideas, Home decor ideas, Nursery, Pregnancy, Uncategorized

DIY Tassel Garland

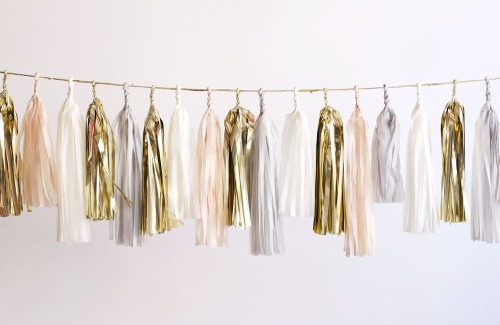
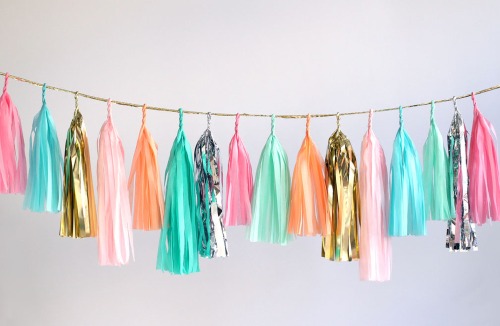
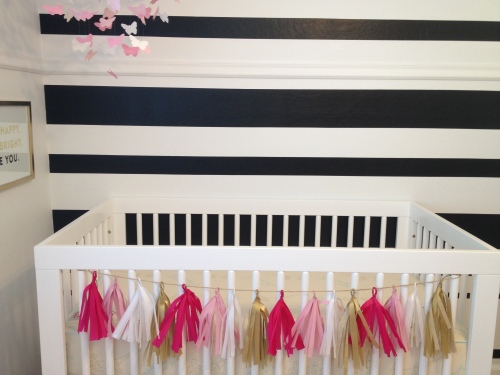
While browsing online for baby shower/nursery decor I was seeing these cute tassel garlands everywhere. It was definitely on my to-do list to purchase one.

Via Confetti System

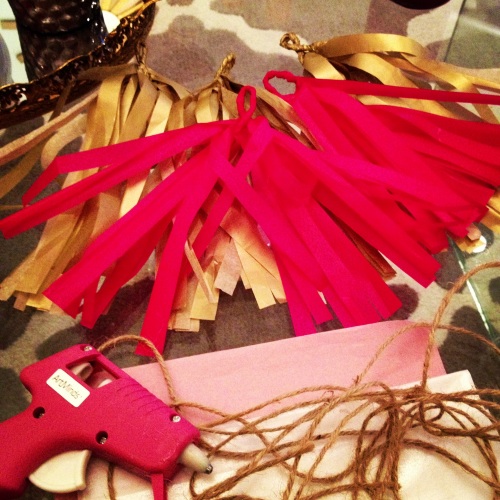
Then I found this super easy tassel garland tutorial on Pinterest by Linen & Lace & thought I’d give it a try. I literally spent $5 on materials! Much better than the $30-$40 + shipping off Etsy.

So while the hubs went out with friends on Saturday night, I dove into crafting mode

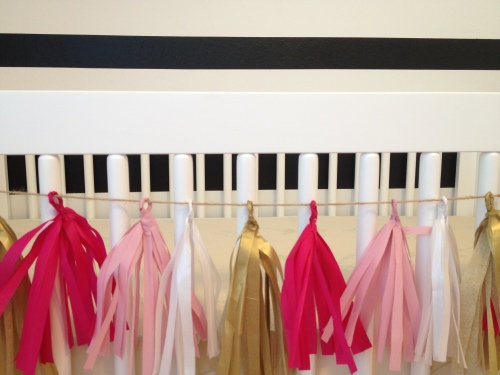
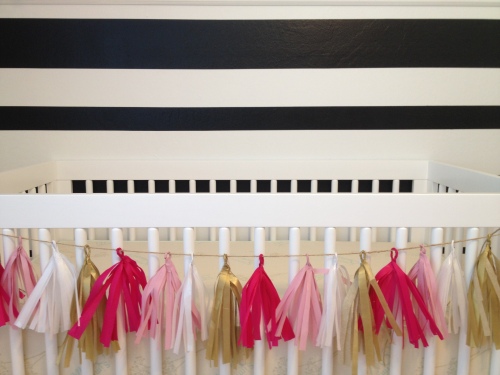
I chose four different colors of tissue paper – gold, hot pink, light pink & shimmery white

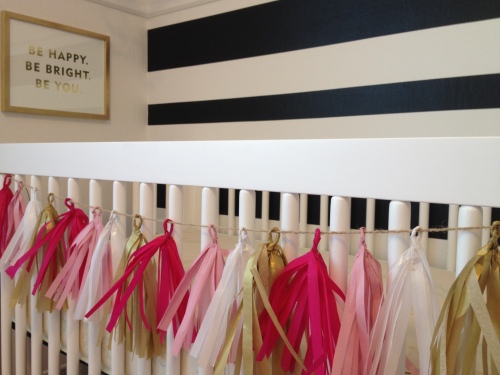
Because I decided to hang this on baby girl’s crib, you are getting a little sneak peak of her nursery!

I love how the garland brings texture & fun girly glamour to her crib & nursery
.. I think she will love it. Obviously I won’t be able to leave it there when she gets older but for now it works.

What do you think? I’m basically addicted. I’ll probably make one for xmas & other holidays too. These are great for any kind of party too! Baby & bridal showers, birthdays, holiday parties or just cute decor in your home.

BTW, yes I’ll be doing a post on the DIY black & white painted stripe wall in the nursery. I’ve got all the tips on how to make perfect stripes with no bleed through!

Here’s my latest pregger shot at 23 weeks

PS. if you’re preggers, check out the new maternity tanks at Target by Liz Lange. They are heaven!!

XO, Melissa

8 Comments

Filed under DIY Ideas, Nursery, Pregnancy, Uncategorized

Washi Tape Corkboard DIY

I found this awesome idea for a corkboard on Pinterest. This was so easy, I literally made this in 20 mins!

{Supplies used}

* 4 pack of 12″ corkboard tiles – found at Michaels

* Japanese Washi tape in your fav color. 15mm size – found on Etsy or here

* 1.5 inch Masking tape (I used frog tape since that’s all we had)

* Scissors

I taped the first piece diagonal across the corkboard  leaving about 1/2 inch on either side to tape to the back

Then I took the frog tape and used it to spacer for the rest of the pink washi tape

Repeat on the other 3 corkboards..

You can do this design or.. switch the tiles around and make this design

and you’re done! Now just stick the tiles to the wall with the adhesive squares provided.

Pretty cute huh?

6 Comments

Filed under DIY Ideas, Home decor ideas

Ikea Shelving Completes the Look!

Friday we made the trip to Ikea to pick up their Lack shelves. $16.99 each?! You really can’t beat that.. and honestly I think they look pretty dang cute in the dining room.

What do you think? I decided on the high gloss white lack shelf instead of the matte finish. In person the matte finish looked super cheap & ugly. I was a little worried about the super modern high gloss shelves looking weird with the shabby vintage decor of the buffet, but I think it works well. Again I ador mixing modern with vintage antique pieces.

I’m loving the look of the open storage & the gold chalkboard accents the wall perfectly.

If you’re looking for storage solutions, I definitely recommend these. They come in a ton of different colors and three different sizes.

Enjoy your week!  Xo, Melissa

7 Comments

Filed under DIY Ideas, Home decor ideas, Uncategorized

Craigslist Buffet Transformation

I’m back!! Sorry for my absence. I’ve had a lot going on recently (business-wise)  and was feeling a little un-inspired in the home decor department.

I’m feeling rejuvenated and ready to share some fun upcoming projects with you! Which brings me to my latest project..

After about a year of searching Craigslist for an antique buffet/sideboard (apparently I am kind of picky) I finally found the perfect piece!

Here’s what it looked like before:

 It has all the intricate details I was after – stunning turned legs, scalloped wood & tons of gorgeous wood detailing.

After a good sanding, 3 coats of paint, stenciling and new hardware.. here is what the buffet looks like after:

Cute right?

{Supplies used}

* 1 gallon Behr paint in pure white satin finish – Home Depot

* 1 gallon Martha Stewart Dolphin Gray in satin finish – Home Depot

* Electric sander –  $30 at Home Depot

* Martha Stewart stencil pack with quatrefoil stencil – Found at Michaels  here

* Martha Stewart sponge paint roller & tray – Found at Michaels here

* New hardware from Anthropology

Now to get started:

Step 1 – Remove hardware & doors. Sand down the wood to remove shine & any scratch marks – I used 80 grit sand paper for this. I had to sand the legs by hand (UGH).

PS. Yes I know my garage looks like a junk yard. We need to have a  garage sale, don’t judge!

Step 2 – Vacuum sanding dust then wipe down entire piece with damp cloth.

Step 3 – Paint time! In both paints I bought the primer & paint all in one, since I really hate priming. Using the all in one paint worked great.

I did 3 coats of white – in some spots I had to do 4 coats

I painted the cabinet doors with 2 coats Dolphin Gray

Step 4 – Stenciling. I decided to use the quaterfoil stencil from the Martha Stewart stencil pack. I was a little tricky at first to get the hang of it. The second drawer was definitely better than my first, but I don’t really mind.

Tape down your stencil, making sure it’s straight.

Only use a small amount of paint on your sponge roller, and gently roll over the stencil. If you use too much paint on your roller, it will seep under the stencil and then design doesn’t come out so pretty.

Not bad right?

Step 5 – Install pretty new hardware & you’re done!

We finally have extra storage!

This weekend Clay & I are going to Ikea to get these floating shelves to go above the buffet. I still need a spot to store all my wine glasses & pitchers, so I think the shelves will work perf. Can’t wait to see what it looks like.

Stay tuned for the big reveal!

By the way, do you think I should paint our dining table?? It seems so dark now..

Oh and we are also going to finally hang this lovely gold chalkboard above the buffet too.

Enjoy your weekend! Xo, Melissa

9 Comments

Filed under DIY Ideas, Home decor ideas, Uncategorized

DIY Wood Pallet Wall

I know the title of this post probably sounds really weird,  but trust me on this! I have been seeing this idea all over Pinterest & “Blogtown”. Honestly it’s brilliant. It’s inexpensive, recycled wood – so it’s Eco-Friendly and gorgeous! I always like incorporating a little rustic into a space. Adding a natural element seems to make a space feel more grounded and homey. Idk, maybe that’s just me.

These walls are made out of FREE wood pallets!! Loving this beachy shabby chic look. To achieve the whitewashed shabby look, brush over the pallets with something like this and then lightly sand with 60 grit sandpaper. You might want to water down the white wash stain, depending on the look you want.

This tutorial shows you how to create a wood pallet wall & the weathered/white washed look. They did an incredible job.

{Via Real Housewives of Bucks County}

{Via Design Sponge}

{Via Just A Girl}

 This darker wood makes the whole room into a masculine and edgy boy room. Love it.

{Via Just A Girl}

Wood pallets are typically FREE, just call around your local area!

This adorable baby boy nursery is the cutest! This Blog has a really good pallet accent wall tutorial as well & great safety tips.

{Via Bower Power}

I am highly obsessed with The Lettered Cottage. See how they re-did their reading room. Simply amazing. I love how the room looks like it’s right out of a Pottery Barn catalog!!

{Via The Lettered Cottage}

Can you believe creating a  wood pallet accent wall is cheaper than painting?!? Not to mention it looks like it’s a billion times more expensive than it actually is.

By the way, this would absolutely increase the value of your home. Just in case you were wondering.

Xo, Melissa & Virginia

6 Comments

Filed under DIY Ideas, Home decor ideas, Increasing Your Home's Value

TV Solutions & Decorating Ideas

TVs are probably the hardest design challenge when it comes to living room spaces. It’s like do you mount it over the fireplace? Hide it behind an armoire cabinet? Stuff it in the corner?! I too have had the hardest time with this. Our living room is pretty small and we have a massive TV! (I blame this on my Husband) I have gotten a couple of emails from readers asking for my ideas on how to make their TV NOT be the focal point of their entire room. So here ya go!

 Idea #1 – Frame art around your TV

{Via Lonny Mag}

AMAZING right?? I love this idea. Embrace your TV by framing art or photos around it! So simple & fun. Personalize it by choosing frame colors that go with your decor!

{Via AB Chao}

It can even be off centered & still look amazing. I love how this blends perfectly with the gallery wall.

{Via Laura Winslow Photography}

Makes such a difference don’t you think?

{Via Pinterest}

Idea #2 – Frame your TV!

{Via Apartment Therapy}

{Source unknown}

{Via FrameMyTV}

Check out Frame My TV for custom TV framing!

You could also go to the antique fair & look on Ebay or Craigslist to find frames to fit your TV

Do you like these ideas? Have you done something similar? I’m always looking for more ideas, so please share!

Xo, Melissa

3 Comments

Filed under DIY Ideas, Home decor ideas

“YUM” Kitchen Sign

Good morning! Hope you all had a nice weekend. I spent mine holding an open house for one of our listings, then we went out dancing with a bunch of friends to celebrate one of my bestie’s birthdays. Sunday, we took Frank to the dog park, did a little shopping and had a nice family dinner at Clay’s parents. I also finished up our photo collage wall. It’s looking pretty dang cute. Can’t wait to share with you tomorrow!

Okay, so I really liked that ever so popular “EAT” sign that has been popping up on blogs everywhere. I didn’t want to just do the same, so this is my take on it:

When the babe & I were at Joann’s last week picking up our items for making our headboard, I spotted these paper mache letters, only $2.99 each. I bought em & sprayed them with my fav spray paint ever – Rustoleum gold metallic… the thing is, it was really cold when I sprayed the letters and the paint started crackling!!

Anyway whatever, I still like them. I think it adds character haha. It kind of reminds me of the cracked nail polish trend that’s going on right now.

What do you think? Do you think I should sand & re-paint it or just leave them?

Oh btw, I used these awesome little adhesive squares to put the letters up. Got them at Joann’s as well. You can remove the adhesive and it leaves no damage at all.

I will definitely be using these paper mache letters for the baby room also! They are just too cute not to.

Xo, Melissa

6 Comments

Filed under DIY Ideas, Home decor ideas

DIY Tufted Headboard Tutorial

I have been wanting a headboard in our room for so long. For some reason it was just never something high on the priority list. I also never really found one I was in love with – that wasn’t $1,000+

The other day, I was searching for something on Google and came across this amazing blog and saw that she did an incredible tufted headboard and tutorial.  So I thought, why not give it a try!

Let me first start off by saying that this wasn’t complicated or hard to do, but just takes time! Clay & I did this over a weekend, but you could stretch it out over the week.

The headboard took about 2 days from start to finish. We followed Little Green Notebook’s tutorial exactly.

After doing this myself, I came up with a lot of tips for you, which I will share throughout this post.

{Materials you will need}

Home Depot

  • Pegboard from Home Depot, cut to size. We measured our bed (King size) and had them cut the pegboard 40 inches high x 76 inches wide
  • Spray adhesive
  • Staple gun & staples
  • Mounting hardware to attach headboard to the wall behind the bed

Joann’s Fabric Store

  • 3 inch thick upholstery foam 

**Huge Tip** Download the Joann’s app on your smartphone for a 50% off coupon. They have coupons every month for 50% off a single item, plus 20% off your entire purchase. For some reason these pieces of foam are extremely expensive – we would have paid $120 just for the foam!

  • High loft batting
  • 3 1/2 yards (less if your bed is smaller than king size) of whatever fabric you like. Originally I wanted a more velvet blush pink fabric, but we found a light blush pink satin fabric for 50% off, making it only $4.99 a yard!

Here was my inspiration photo

  • 4 inch upholstery needle
  • Waxed button thread

**Tip** I highly recommend using waxed upholstery grade thread, don’t use non-waxed. Half way through the tufting, we ran out of thread, so I went to a different fabric store that was closer to our house. They only had non-waxed thread. It was IMPOSSIBLE to work with. We ending up having to go back to Joann’s to get the waxed stuff anyway. The wax sticks to the fabric and makes it much easier for making knots as well – more on that later.

  • Button making kit + refills 5/8 inch size – enough to make 58 buttons. You can do less if you plan on having less tufts or if you have a smaller headboard.

Total cost $150 – not bad for an upholstered king headboard

Now that you have all your supplies let’s begin!!

First you will need to figure out your tufting pattern – we decided on rows of 11 and 10 buttons, alternating each row

circle where you will make your holes with chalk

then take a sharpie and make dots through the chalk marked holes.

Take the pegboard off and now you have your pattern.

Take a pairing knife and cut out your tuft holes

Now that all your holes are done, use your spray adhesive and glue the foam to the pegboard. Now all the holes will match up and you’re ready for tufting.

**Tip** make sure to let the foam hang off a 1/2 over the pegboard on the top and sides. This will make the edges more cushy and soft looking when you go to staple the fabric around the edges.

Then make your buttons with your kit

This part wasn’t as bad as I was anticipating.. we watched some Oprah & Real Housewives + we had this fatty to keep us company 🙂

Once all your buttons are done

Lay your pegboard, foam, batting &  fabric down – in that order

Take your needle, waxed thread & button

and poke it through your first hole

Pull it through and staple a couple of times. Triple knot the thread around the staple to ensure it doesn’t come loose

And there’s your first tuft! Yeee!

I am so thankful the Little Green Notebook said to start in the middle of all rows and work your way out with the tufts & save the edge tufts for last.

Knowing us, we would have totally botched this part if not for her advice!

After all your tufts are done, staple at the bottom on the foam slightly pushing up when stapling so that your staples aren’t visible.

Then just simply pull fabric tight around all edges and staple to the back!

Attach your mounting hardware & attach to your wall behind your bed & there you go!!

What a difference this pretty headboard makes in our room!

Notice how the tufting starts right at the top of our mattress and the rest hides behind the bed perfectly

Our headboard kind of reminds me of this Pottery Barn one – I think ours is way cuter though and we didn’t have to spend $800 Yay!

What do you think? Are you thinking about making one??

It really makes our bedroom feel so romantic & chic. What do you think of the color?

The best part is, I was about to buy something identical to this headboard for $600 about a year ago. With everything said and done, we spent a total of $150!

Hope you like our headboard as much as we do!

Xo, Melissa

15 Comments

Filed under DIY Ideas, Home decor ideas, Uncategorized